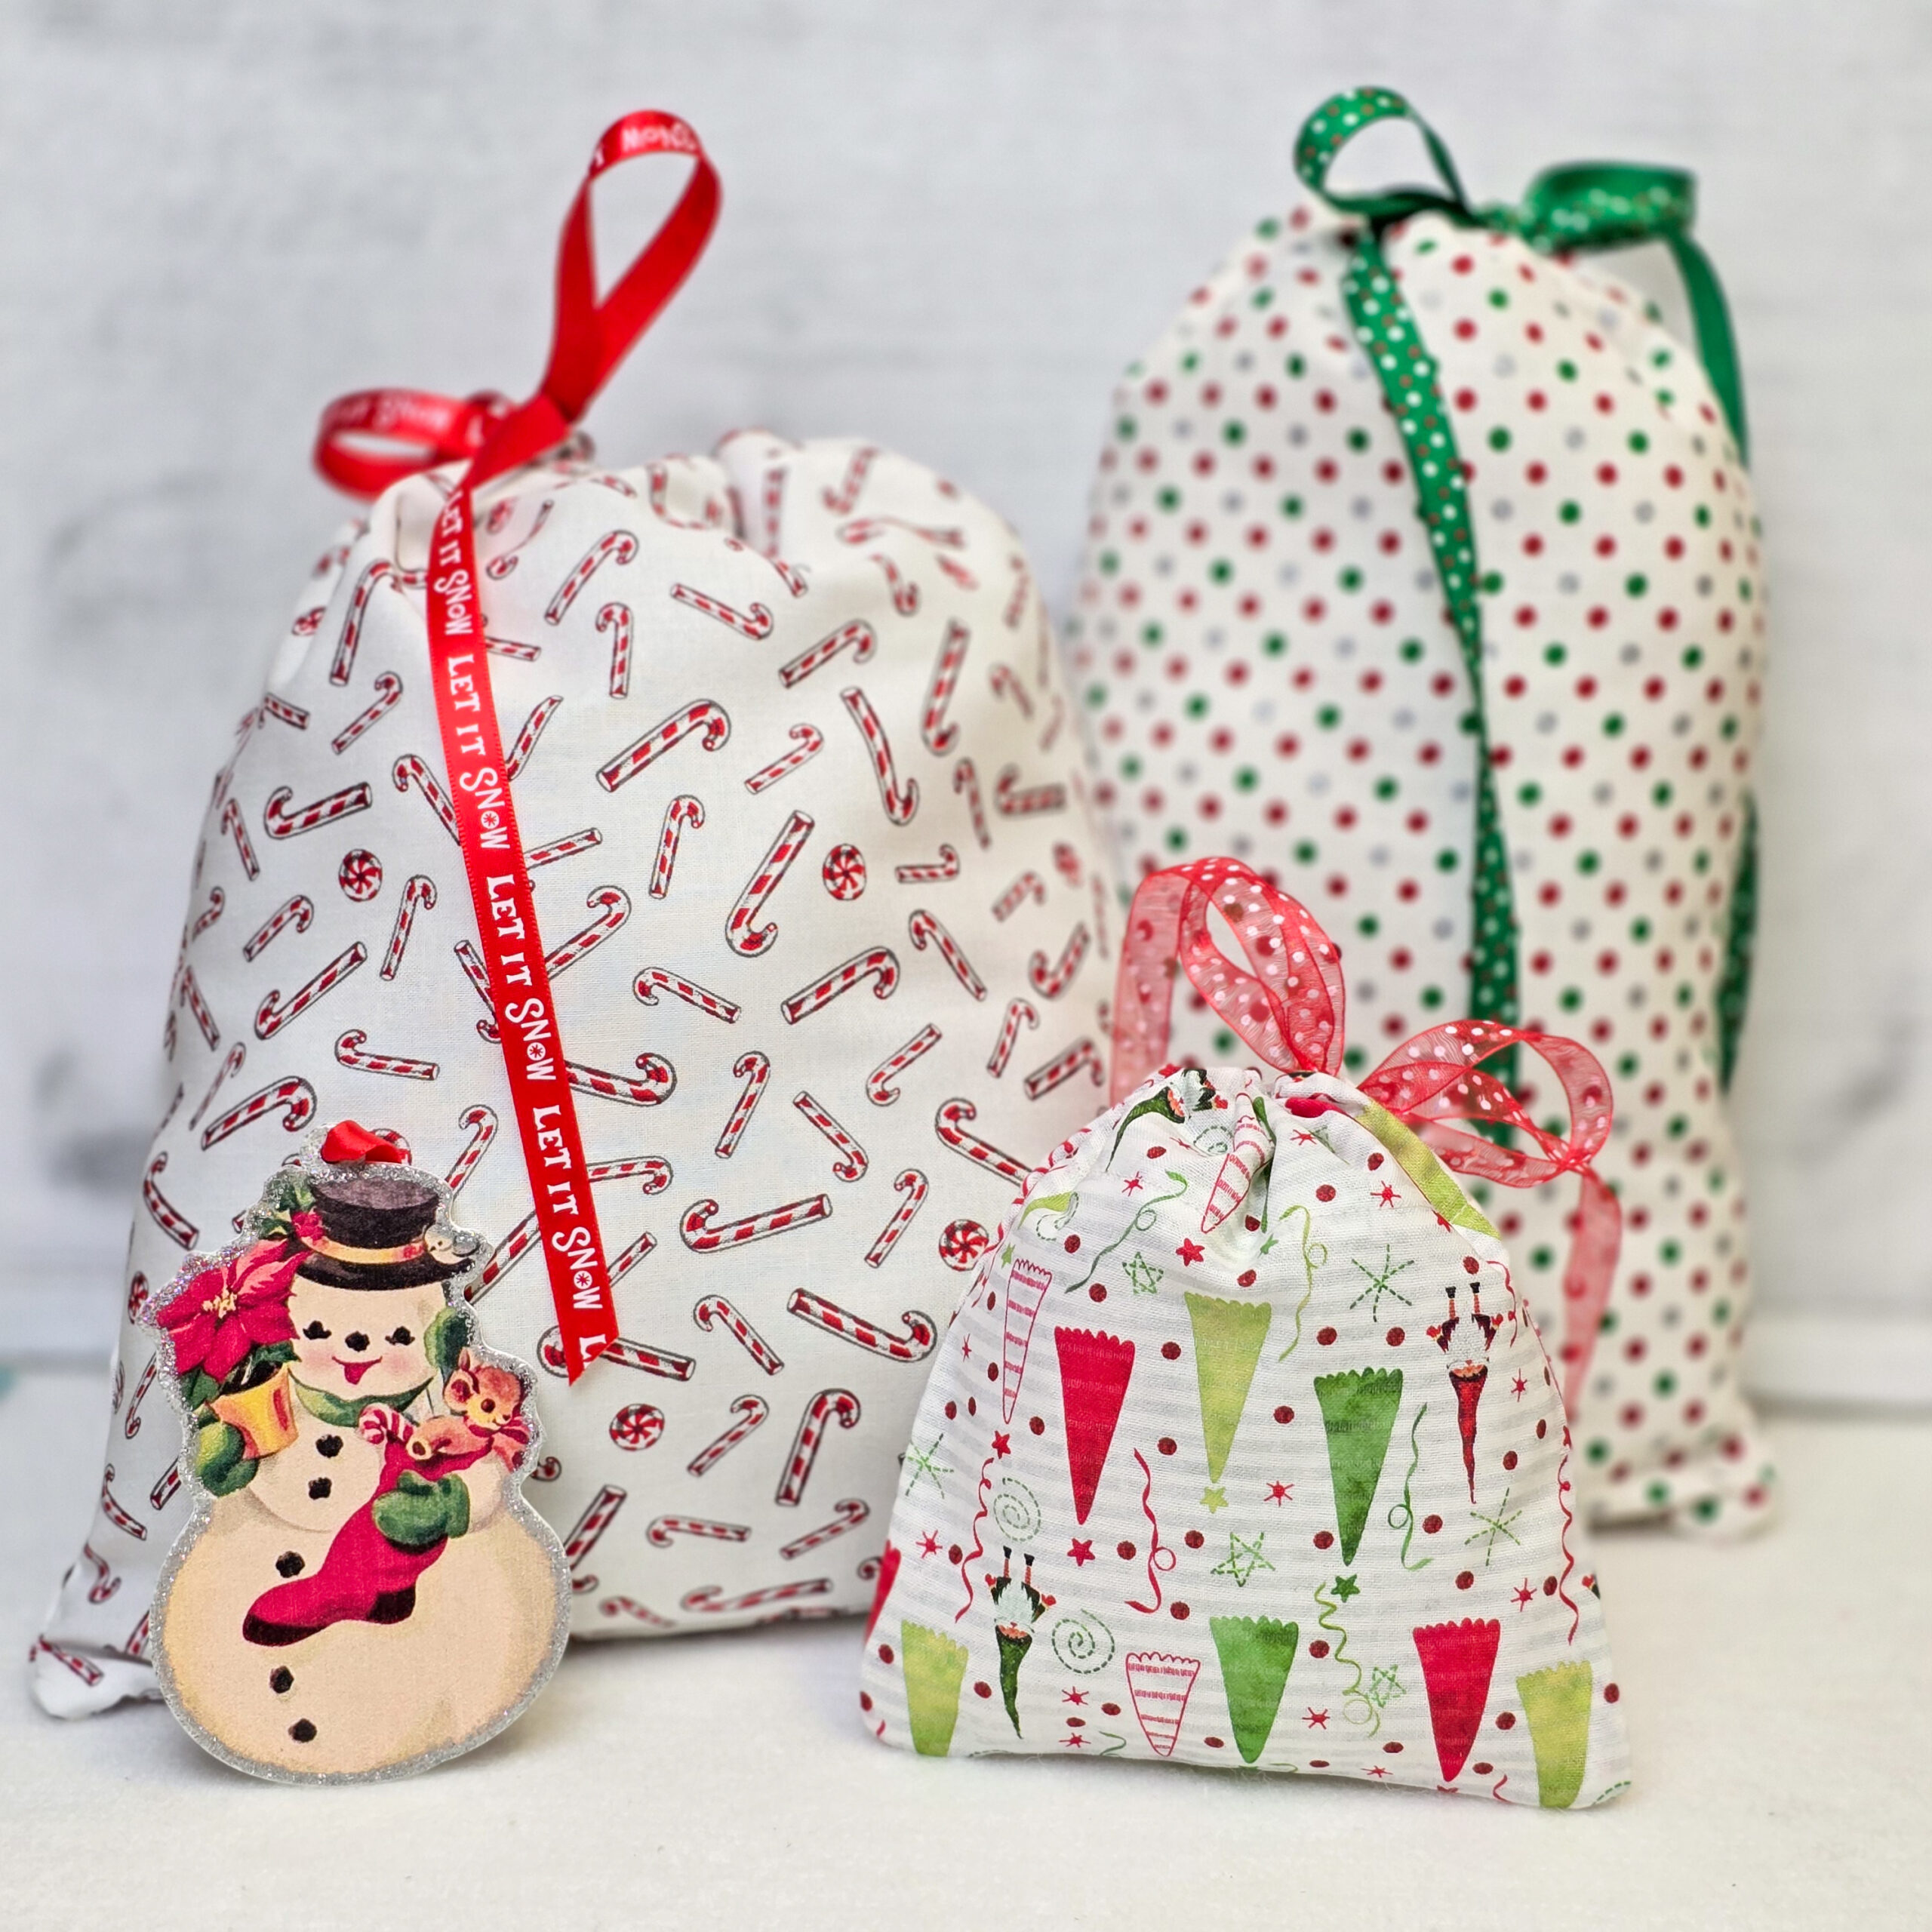
Looking for a quick, thoughtful way to wrap your gifts? These fabric gift bags are reusable, eco-friendly, and add a handmade touch to your presents. Perfect for Secret Santa exchanges, teacher gifts, holiday treats, or small surprises for friends and family, these bags are as versatile as they are charming! Plus, they’re a breeze to sew and can be customized to suit any occasion—think festive prints for the holidays, bright colors for birthdays, or elegant fabrics for special milestones.
Whether you’re a beginner or a seasoned sewist, this tutorial will guide you step-by-step through making your own reusable fabric gift bags. They’re so quick and fun, you might find yourself making a whole batch in a variety of fabrics to have on hand for future gifting!

Gather Your Fabric Gift Bag Sewing Supplies
- Fabric: I love using cotton quilting fabric for these bags, but feel free to get creative! Velveteen, satin, or even burlap can give your gift bags a unique flair. Choose whatever fabric makes you smile!
- Ribbon: Grosgrain and ribbon works great. Look for widths between ½ inch and ¾ inch.
- Rotary Cutter and Mat (or Scissors): For cutting your fabric to size.
- Sewing Pins: To hold your fabric in place.
- Safety Pin: This will help thread your ribbon through the casing.
- Iron and Ironing Board: For pressing seams (this step makes a big difference!).
- Sewing Machine: Any basic sewing machine will do the job.
Cut and Prepare Your Fabric
Decide on the size of your gift bag and cut two rectangles of fabric to match. Here’s a basic guide to get you started:
Small Bag: 6″ x 8″
Medium Bag: 10″ x 14″
Large Bag: 15″ x 20″
Pro Tip: If you’re wrapping something oddly shaped, measure around the item and add 2-3 inches for ease.
Use your iron to press the fabric to smooth out wrinkles. Pressing also makes your sewing easier and more precise.

Step 1: Prepare the Long Side Edges
Place your fabric on a flat surface with the right side down and the the wrong side up. Take one of the long edges of the fabric and fold it over by ¼ inch toward the wrong side. Use your iron to press the fold in place.
Step 2: Fold Over Again
Fold that same edge over again by another ¼ inch, enclosing the raw edge completely. Press the fold with your iron for a crisp finish. Now for the other long side – follow the same process on the opposite long edge: fold ¼ inch, press, fold another ¼ inch, and press again.
Step 3: Prepare the Top Edge
Take one of the short edges (the top of your bag) and fold it over by ¼ inch toward the wrong side of the fabric. Press the fold with your iron to keep it in place.
Step 4: Create the Casing
Fold that same top edge over again, this time by 1½ inches, toward the wrong side. Press the fold for a crisp finish. Use sewing pins to secure the fold, ensuring it stays even while you sew. Follow the same process for the opposite short edge: fold ¼ inch, press, fold another 1½ inches, press, and pin.

Step 5: Sew the Casings
Using your sewing machine to sew along the folded edge of one top side, stitching approximately 1¼ inches from the top of the fabric. This will secure the casing in place. Once sewn, trim off any loose threads. Move to the second top edge and repeat the same process to sew the casing. Both top edges should now have neat casings ready for your ribbon to be threaded through.
Step 6: Assemble the Bag
Fold your fabric in half with the right sides together (the pretty sides of the fabric facing each other). Make sure the top edge casings are aligned. Use pins to secure the sides and bottom of the bag, ensuring the edges stay in place as you sew. Starting just below one casing (see where my seam ripper is sitting in photo), sew down the side of the bag with a ¼-inch seam allowance.
Continue sewing across the bottom and up the other side, stopping just below the bottom edge of the casing on the opposite side. Backstitch at the beginning and end of your seam to reinforce these stress points. Your bag should now be sewn together, with the top casings left open for threading the ribbon. Trim any loose threads before moving to the next step!
Note: Since the bag is folded in half, stitching across the bottom isn’t strictly necessary. However, I do it because sewing continuously down one side, across the bottom, and back up the other side saves time compared to starting and stopping for each side separately. Skipping those extra backstitches and trims can really add up when you’re making multiple bags!
Step 7: Finish the Bag
Gently turn your bag right side out, using your fingers or a blunt tool (like a chopstick) to push out the corners neatly. Measure and cut a piece of ribbon that is twice the width of your finished bag, plus an extra 6 inches. This will give you enough length to create a bow when the bag is cinched. Dab a small amount of fray check sewing glue on both ends of the ribbon to prevent it from unraveling. Let it dry before threading the ribbon through the casing. You could also just tie a small knot at the ribbon’s ends instead of using fray check.
Thread the ribbon through the casing by securing a safety pin through one end of the ribbon. The safety pin will act as your threading tool. Insert the safety pin into one side of the ribbon casing and gently guide it through the fabric tunnel. Keep sliding it along until it comes out the other side. Without removing the ribbon from the safety pin, reinsert it into the casing on the opposite side of the bag. Thread it through this second casing until it comes out where you first started. Once the ribbon is fully threaded, remove the safety pin and smooth out the ribbon.